 Imagine you would like to invite two well-established professionals to your economics class to speak about their professions, career paths and real-world experiences. Unfortunately though, you discover one person’s company recently transferred him to Beijing, China, and he will not return to the United States for another two years. The other individual lives in California, and her schedule will not allow her to fly out to Elon for a couple of days. With the help of Google+ Hangouts, your dilemma is resolved. Continue reading
Category Archives: Tech Tips
Getting Started with Google+ Hangouts
Getting started with Google+
![]() Are you looking for a way to virtually meet and share links, videos and resources with your students? You may want to consider Google+.
Are you looking for a way to virtually meet and share links, videos and resources with your students? You may want to consider Google+.
Overview
Google’s social media tool offers unique collaboration and control features that make it very appealing to instructors in higher education. It also works well with Google’s other applications like Google Drive and YouTube. This post provides an overview of Google+ and how it can be used in higher education. You can learn more about Google+ by clicking on the “+You” link at the top of Google.com. Continue reading
Record brief videos to introduce yourself or course content
 YouTube includes a largely unknown feature that makes it quick and easy to record video. That’s right — record video! It’s easy because no other video software is needed, it records directly into YouTube.
Educators can quickly record a video welcoming students to a course, introduce an assignment or important course concept, or make an announcement. These short videos are a simple way to build a connection with students, particularly for online classes. In this post, we’ll talk about what you need to record videos using YouTube, tips for recording talking-head videos and a detailed tutorial.
What you need
To record videos in YouTube, you need a webcam and a YouTube account. Mac owners are in luck because most Apple computers already have a webcam. If you don’t have a webcam, you can check one out from Elon’s Media Services, located in Belk Library. Call (336) 278-6598 for more information. If you don’t have a YouTube account (Gmail accounts also work), click here to create a Google account.
Tips for recording videos
- Content: This method of recording videos is recommended for broad concepts or ideas rather than specific details or facts on the course content. Use these videos to introduce a concept or an assignment, tell a story that ties to the course content or as a way to humanize yourself. Detailed lecture-like recordings are better when accompanied by visual aids. If you want to include visuals such as photographs, PowerPoint slides or other images, tools like Adobe Connect, PowerPoint, Jing or Screencast-O-Matic are better at combining video and visuals. Contact Teaching and Learning Technologies for more information about these tools.
- Script: If you don’t use a script in your classroom, don’t use one on video. Like in the classroom, your ideas should be outlined but a natural delivery is more important than a precise delivery. Try to have a conversation with your webcam.
- Practice: It’s not easy to talk to an inanimate object. The first few times you do it, it will feel awkward. Give yourself a few times to practice. Remember, it doesn’t have to be perfect, just comfortable.
- Be brief: Most talking-head web videos should be around five minutes. If you want to say more, record a few short videos.
- Look into the camera: Your instinct will be to look at your computer screen while you’re recording but try to look directly into the camera. This is the best way to simulate eye contact with the viewers.
- Backlight: Be careful not to have a window or any bright light behind you. If there is, the web camera will assume everything in the picture is that bright and will darken the entire picture and making it difficult to see you. Instead, have any bright lights in front of you, so the light is shining on your face, not your back.
Example
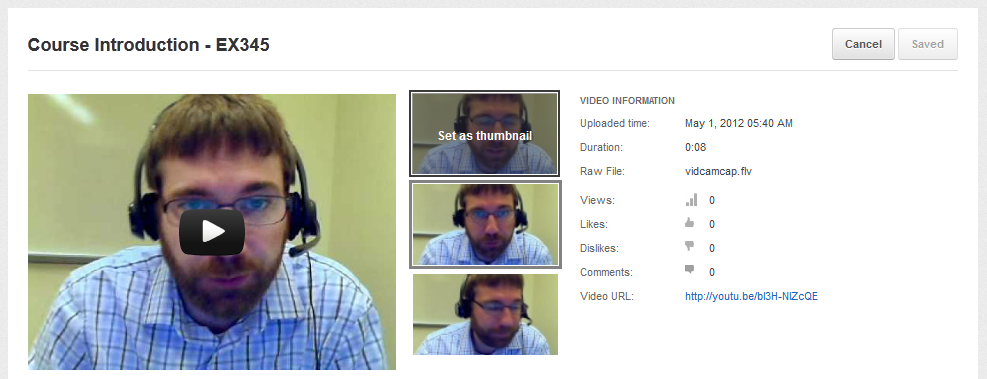
Here is an example I recorded in about 8 seconds on YouTube.
http://www.youtube.com/watch?v=bI3H-NlZcQE
How-to record a video using YouTube
Step 1: Connect your webcam to your computer
Step 2: Go to www.youtube.com and login with your YouTube (or Gmail) account
Step 3: Click “Upload” at the top of the page
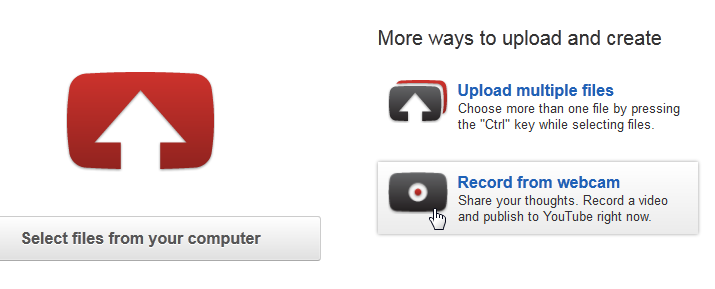
Step 4: Click “Record from webcam”
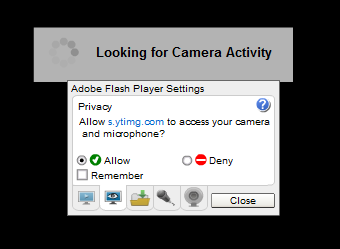
Step 5: In the popup box, click “Allow” to let YouTube use your webcam to record this video
Step 6: Click “Close.” You should see yourself on the page.
Step 7: Verify your webcam and microphone settings. Test your microphone and check to see audio is being heard (say a few words, you should see audio bars moving up and down). If audio is not being registered, change the webcam or microphone settings and choose the correct microphone.
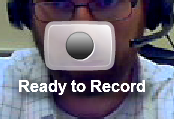
Step 8: Click the record button in the center of the screen to start recording. Remember to try to look directly into the camera, and don’t worry if you make minor mistakes. The video will feel more natural if it isn’t 100% perfect.
Step 9: When you are done, click the stop icon. The video will process for a few seconds. Additional options should appear on your screen — you have the option to “Re-record” your video (erase what you have recorded so far and record another version), “Preview” (view what you just recorded) or “Publish” (post the video to YouTube). If you are happy with the video, click on “Publish.” If not, click on “Re-record.”
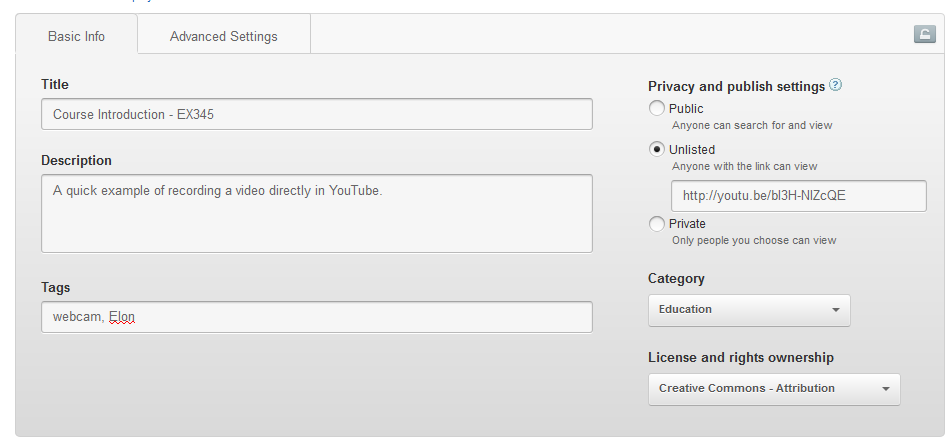
Step 10: Your video is now processing on YouTube — this typically takes a few minutes. In the meantime, fill in the video’s “Basic Info” at the bottom of the page. Include a “Title,” Description,” and “Tags.” If you want to limit the people who have access to your video, change the “Privacy and publish settings” to “Unlisted.” This means that only people who have the direct link to your video will be able to view it, rather than anyone searching or browsing on YouTube. Below is a screenshot of the recommended settings.
Step 11: After you’ve added the necessary information, Click “Save changes.”
Step 12: Refresh your browser. If your video is done processing, it should appear on the screen. If it’s not ready, wait a few more minutes and refresh your browser again. Click on one of the images to set it as a thumbnail preview.
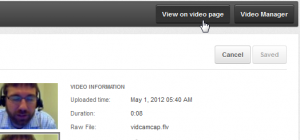
Step 13: That’s it! The only thing left is to share the video with your students. Click on the “View on video page” near the top of the page. This will take you to the YouTube page for this video.
To share your video, you can either email this link to your students or embed the video directly into Moodle. To embed the video in Moodle, follow the directions from our previous post, Reduce distractions and embed YouTube videos in Moodle (skip down to the “How-to” section of the post).
Do you have another way to record videos? Let us know in the comments. Or contact Teaching and Learning Technologies with your questions or for assistance with recording your videos.
Video Recording in Progress image by Flickr user Jeremy Brooks / Creative Commons licensed BY-NC 2.0
About the author
 Dan Reis is an Instructional Technologist with Elon University’s Teaching and Learning Technologies.
New Prezi Features
 Prezi, an online presentation tool, has released several new features listed below. Learn more about Prezi.
Prezi Meeting
Color Wizard
Drag and drop files to PreziDesktop
Snap to
Get legal with image search
 NspireD2
Cathy Schulz, my colleague in the OpenCourseware project, works hard to guarantee that materials she publishes online are legal to share. For example, faculty members send her images they use in the classroom, where fair use applies. Before an image can be shared with the world, though, Cathy has to find out who owns it. That can be very tricky when the instructor can’t remember where they got the image – or when the “source” has used someone else’s image without permission.
Indaba Music – a great resource for music teachers and students
![]() Indaba Music is a wonderful example of how Internet based tools can raise “collaboration” to a level far exceeding what has been possible up to now.
Indaba Music is a wonderful example of how Internet based tools can raise “collaboration” to a level far exceeding what has been possible up to now.


 Follow
