Abbey Foucart, English PWR Major ’17
With all the website makers to choose from, Weebly stands out as a great choice for any purpose or audience. Among its options are both professional and recreational appearances, and straightforward instructions make it fairly easy to use.
To sign up for a website, go to the homepage, www.Weebly.com, and enter a username, email, and password. You are next directed to choose whether you want to pay for additional services. If you are aiming to create a more professional presence, you may be interested in these, but no money is necessary to create a basic page. Additionally, you must choose the focus of your site: site, blog, or store (although this choice does not impact the features you can choose from later).
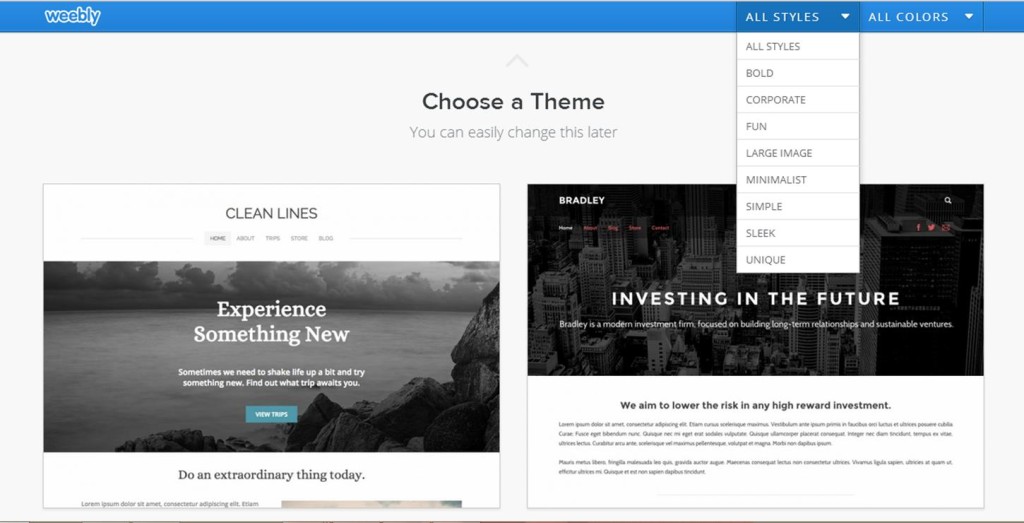
There are several choices for a website theme; if the abundance of options seems overwhelming, you can use the top search for a style or color that fits the type of site you are creating:
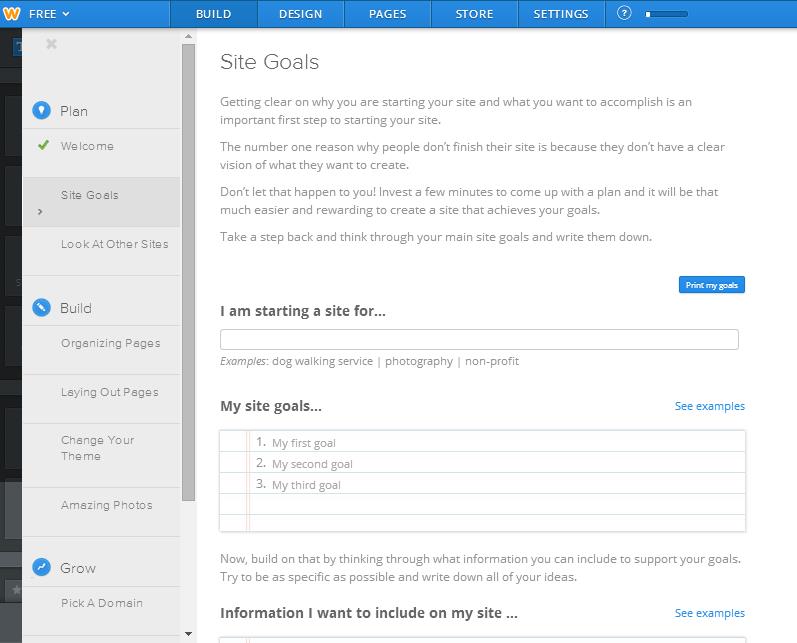
Once you have chosen the basic options, Weebly provides you with a tutorial of how to use the website, referred to as the “Site Planner”. You are prompted to document the goals for your website, although this is not a mandatory step. Use the menu on the left side of the screen to move between different steps, marking at the bottom left-hand side of each that you have completed the step.
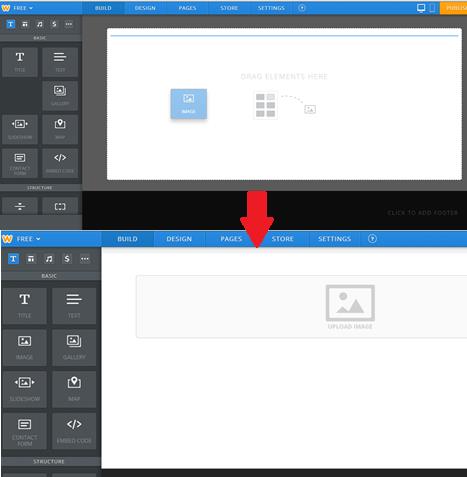
Now it’s time to make the site your own! Use the tabs located at the top in blue to toggle between different editing options. The first two tabs, “build” and “design, give you a visual of the website that you can interact with and edit. In build mode, you can choose to incorporate different types of media by dragging the corresponding box on the left menu to the white block on the webpage that says “drag elements here” and then clicking on the white block to upload or drag the media. An example is shown below.
Within build mode, you can edit header sizes and pictures.
“Design” mode allows you to edit the overall appearance of the site rather than the content. It al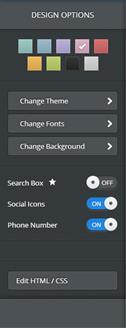 so lets you edit headers but more broadly lets you change font, background, and theme. This is an opportunity to give your website its own unique presence; even if you choose not to pay for a special package, there are enough design options to prevent your site from looking like another.
Next after “design” is the “pages” tab. Weebly starts you off with three pages: “Home”, “About”, and “Contact”. Under this tab you have the option to change the types of pages, choosing from “standard”, “blog”, “store”, or an “external link”. You can also change the page names, change the privacy of specific pages, add pages, and reorder them. There is an interactive list of pages on the left side column (highlighted by a red box in the image below): click on a page to edit it or drag it up or down to change the order. To create a subpage, drag a page under another and to the right. When someone navigates your website menu, they’ll see the subpage when they place their cursor on the page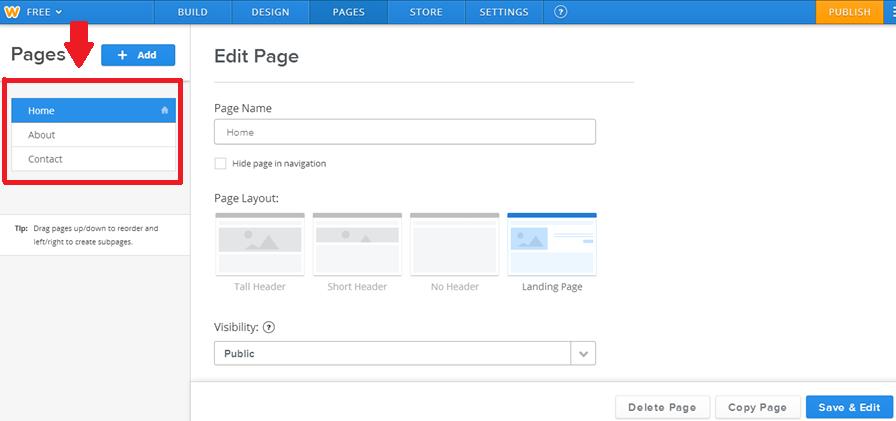 title it is connected to.
Weebly has the unique option of letting users design an online store. If this is the intended purpose of your website, click on the “store” tab, which allows you to add all the elements required for an online store: upload products, choose pricing, and create coupons.
In the last tab, “settings”, you decide on the domain and name of the website. By going through the menu on the left, you can add editors and members to your site if desired. If you want people to be able to access your website through search engine, you can edit your options by clicking SEO in the menu.
When your site is ready for the public, don’t forget to hit “publish”! Click the publishing button located in the top right-hand corner. You will be asked again whether you wish to change your domain and then asked to verify your identity. You can opt to share your website on different forms of social media to gain more viewers.

 Follow
One Comment
Great post, Abbey! This is a really well-developed and easy-to-follow guide to using Weebly. It reminds me in some ways of using Wix, but it definitely has a lot of its own distinct qualities. You also did a great job presenting this in class!