Transposing Data Columns to Rows in Excel
Transposing Data Columns to Rows in Excel
Here’s a scenario:You have an Excel spreadsheet full of data, hundreds of data points all in a column.There’s only one problem: they’re in different columns, and you need them in different rows.No, you don’t have to re-type the whole thing!Here is a quick and easy way to transpose data from columns to rows.
- On the worksheet, do the following:
- To rearrange data from columns to rows, select the cells in
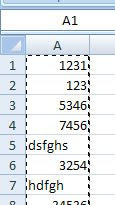 the columns that contain the data.
 - To rearrange data from rows to columns, select the cells in the rows that contain the data.
- To rearrange data from columns to rows, select the cells in
- On the Home tab, in the Clipboard group, click Copy, or just click Ctrl + C.

Note:You can only use the Copy command to rearrange the data. To complete this procedure successfully, do not use the Cut command.
- On the worksheet, select the first cell of the destination rows or columns into which you want to rearrange the copied data.


Note: Copy area(s) and paste area(s) cannot overlap. Make sure that you select a cell in a paste area that falls outside of the area from which you copied the data.
- On the Home tab, in the Clipboard group, click the arrow below Paste, and then click Transpose.
- After the data is transposed successfully, you can delete the data in the copy area.
Quick Note: If the cells that you transpose contain formulas, the formulas are transposed and cell references to data in transposed cells are automatically adjusted. To make sure that formulas continue to refer correctly to data in non-transposed cells, use absolute references in the formulas before you transpose them.
No more headaches just because you want your Excel data displayed differently.With a couple clicks of the mouse you can transpose data from rows to columns, and now you know how to do it.
That’s all for now!Until next week,
The elite Program
 Follow