Making the Maker Hub: 3d printer and scanners
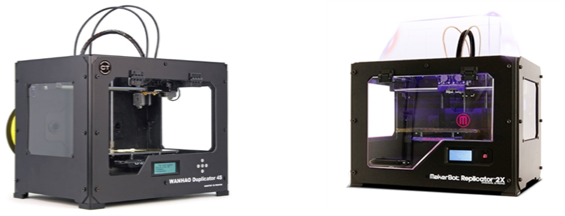
Wanhao Duplicator 4S and MakerBot Replicator 2 Photo Credit: WanhaoUSA, MakerBot
Editors note: Elon is opening a makerspace, called the Maker Hub, this fall. In preparation, student staff member Connor TeVault is spending the summer testing and configuring equipment that will go into the space. He’s keeping track of quirks and lessons learned in this series of blog posts.
This week I unboxed a new 3D printer, two 3D scanners, and began work on reproducing an award using 3D printing and scanning. This post assumes a basic understanding of filament based Fused Deposition Modeling (FDM) 3D printing. An excellent introduction to the topic can be found at 3Dprinting.com.
Wanhao Duplicator 4S
At the beginning of the week I unpacked our new Wanhao Duplicator 4S 3D printer. The Wanhao is a clone of the MakerBot Replicator 2X that comes with more features and a much lower price tag.
The star feature of this printer is its dual print head. Having two filament extruders side by side allows for 3D printing using two colors of filament or using multiple plastic types at the same time.
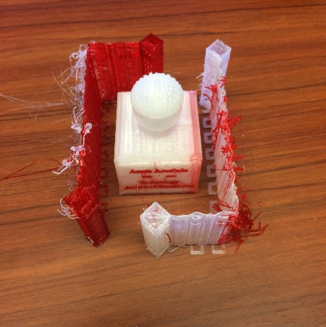
A dual extrusion print using Natural PLA and Ruby Red PLA. Note the walls which are added by the Makerware slicer to allow the printer to wipe oozing filament from the inactive extruder. This oozing filament is not all caught, resulting in the smeared red text and bleeding on the right side.
The printer can also be configured to use both extruders to print two copies of the same small object simultaneously, more than doubling the rate at which multiples of an item can be printed (commonly called “ditto printing”).
A first generation MakerBot Replicator Dual using ‘ditto printing” to print two copies at once.
Unpacking and software setup
The printer required some minor assembly and setup out of the box. One nice touch is the leveling system included for the heated build plate. The print bed has four wing nuts on the underside threaded to bolts which go through small springs offsetting the platform from the Z-axis carriage. These nuts can be tightened or loosened and the springs will keep the print bed stable, allowing for easy and on the fly tuning of print bed calibration. This seems minor, but coming from a 3D printer without this feature it makes a world of difference in print consistency and ease of use, both of which are high priority for the Maker Hub project.
View from underneath the print bed, featuring bed leveling springs.
After assembly and calibration were complete, software became my main focus. The bundled software suite, ReplicatorG, is very granular in the control and telemetry it provides to the user, favoring a dated interface and confusing task flow to allow for a wealth of options and customization. Among other utilities it allows the user a choice in slicer back ends. The slicer is a program which is able to generate the toolpath for the 3D printer (the path which the extruders will follow to print a given design) by “slicing” the 3D model into many layers between 10 and 40 microns thin, generating a .gcode file. Given the infancy of the field there are many options available, each with its own strengths and weaknesses. The Wanhao software uses a recent version of Skeinforge as the default slicer, while allowing the user to choose between several other versions as well as Slic3r, a more experimental and efficient program. ReplicatorG also has support for dual extrusion printing, though it is limited to a utility allowing the user to combine two pre-existing .gcode files (one for each extruder to use).

MakerBot Makerware Desktop vs. ReplicatorG. Makerware includes a storefront, full integration with Thingiverse, and an intuitive feature set as well as native dual extrusion support.
After hours of frustration and fighting with the primitive interface of ReplicatorG as well as strange errors in dual extrusion I chose to research alternatives. Luckily, I found that thanks to the close relation between the Wanhao 4S and Replicator Dual it is possible to install MakerBot drivers and use Makerware Desktop, the 3D printer management software developed alongside the MakerBot family. This software has a much more polished design, and by hiding its advanced options in configuration menus it manages to be very simple to learn and use while still allowing for decent customization. The printer can be run either directly over USB or by exporting the print file to an SD card and moving it to the printer. I initially used the USB connection, but after a computer crash 3 hours into a 5 hour print job I began to use the SD card exclusively, something I would recommend for any print more than 10 minutes long.
Cubify Sense
The Cubify Sense 3D scanner is basically a handheld Xbox Kinect. Using the included Sense software one can choose an item and scan it by moving the Sense device around the object. The scanner measures the distance of multiple points on the object to build a 3D model while it measures the relative movement using onboard accelerometers, simultaneously recording color data using a traditional camera. After scanning a 3D model is automatically constructed and the software allows the user to edit and refine the model before exporting. After some experimentation I found that a distance of around two feet and low, diffuse lighting produces the best scans of objects. Even so, I was not satisfied with the quality of the scans I took of the Acorn Award, or impressed with the performance and feature set of the Sense. I am excited to use the new Fuel3D Scanify we have acquired for the Maker Hub. The Scanify is a point and shoot scanner, so there is none of the hassle of rotating around with a USB tether, and the software included can stitch together scans from multiple angles for a complete model. I think this new scanner will open up some very cool opportunities for Maker Hub workshops and interactive marketing. The portable nature of the Scanify means a student worker could take snapshots of people at a Mosely table and invite them to visit the Maker Hub to print out a personalized action figure of themselves. Just an idea.
Acorn Accolade

The Acorn Accolade and several attempts at reproduction
The Acorn Accolade is a trophy that Elon Technology will begin to award to technology staff. The trophy is a carved wooden acorn mounted atop a wooden box with a plaque on it. We have been trying to reproduce the award using the Wanhao Duplicator 4S, a task that has been more difficult than it sounds. Initially I played with the idea of scanning the award using the Cubify Sense 3D scanner but was not satisfied by the low resolution and poor performance of the scanner. I chose to model the acorn from the ground up using CAD software, which allowed me to tweak the design slightly to negate some of the limitations of 3D printing. I used Solidworks, a commercial CAD program. The software is only installed on computers in the engineering suite (and runs over $1000 per license!) I have begun to research free and low cost alternatives to use in my work and ultimately the Maker Hub.
Next week, I’ll be looking at our other 3d printer, the Fusion 3d.
 Follow