
Rachel Fishman – ENG-PWR ’15
Adobe Photoshop’s abundance of possibility may seem overwhelming to some—it certainly did to me at first! However, there are some basic features that can take you a long way. And as you start to understand how Photoshop is organized, features that once seemed over-complicated will become more intuitive. In this blog post, I am going to take you through some of the main features that Photoshop has, as well as highlight some of the tools that I have found most useful.
To Begin
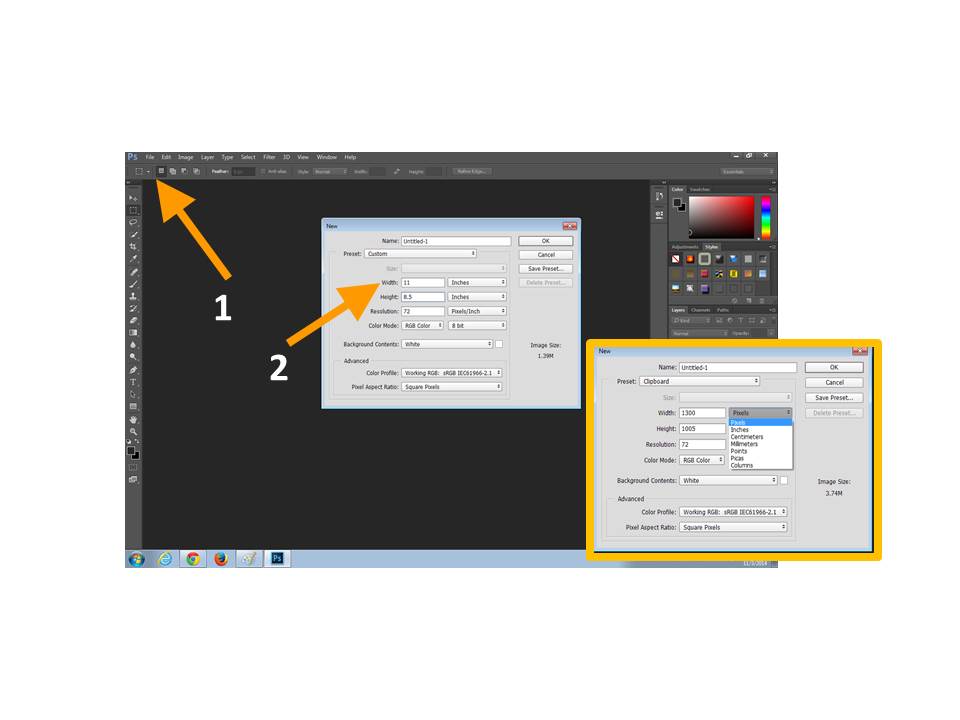
To create a Photoshop document, select File>New. Then, you can determine the measurement that you prefer. If you are editing an image and want it measured in pixels, then pixels would be a good option. But if you are creating an image that you want to be the background on a flyer, for instance, it would be more beneficial to set the size of the document using inches. In the example below, you can see how I made my document 8.5”x11” as a standard paper size.
Adding & Adjusting a Basic Image
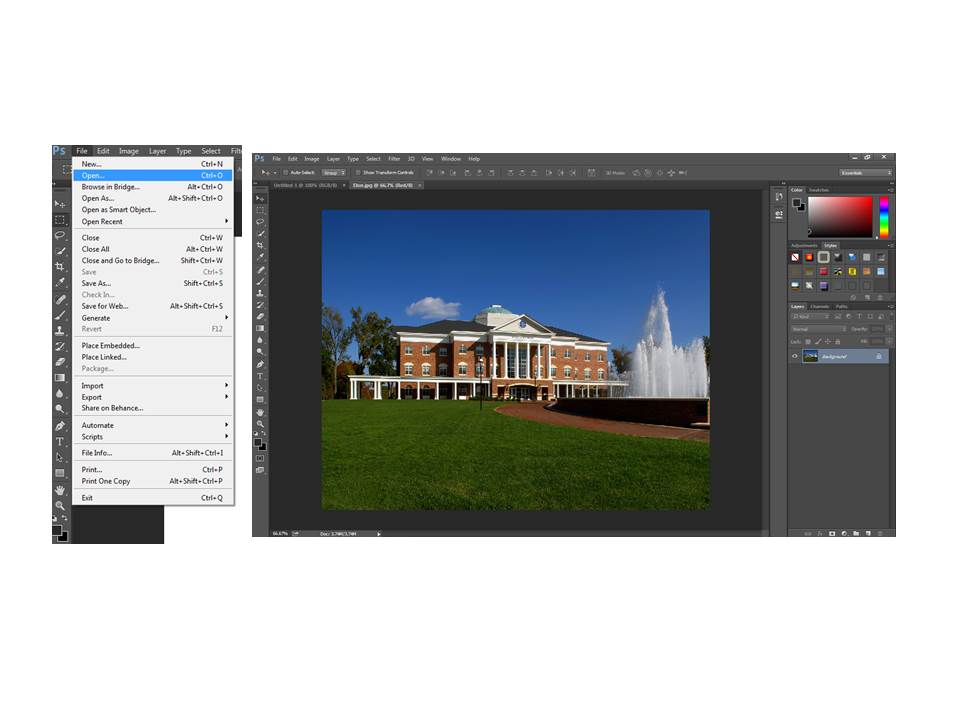
Inserting an image in the document is then quite easy, just go to File>Open and select a photo. You cannot just copy and paste in Photoshop, so just make sure you save the image that you want to add.
There is a plethora of options for adjusting your image, from altering the contrast to changing the saturation, and even adding a Photoshop filter to your picture. To view these possibilities, go under Image>Adjustments. Two of the adjustments I think prove particularly useful are Vibrance and Saturation, options that I didn’t understand the difference between initially. To clarify, Vibrance increases the saturation of the less saturated colors in an image, making it the ideal alteration for portraits; Saturation increases the intensity of all the colors in the image equally, so it basically pumps up the overall color.
You can also crop an image by selecting the Crop option towards the top of the left side toolbar. This allows you to select any part of the image that you want to save. To follow through with cropping, simply press “Enter.”
Understanding the Basics
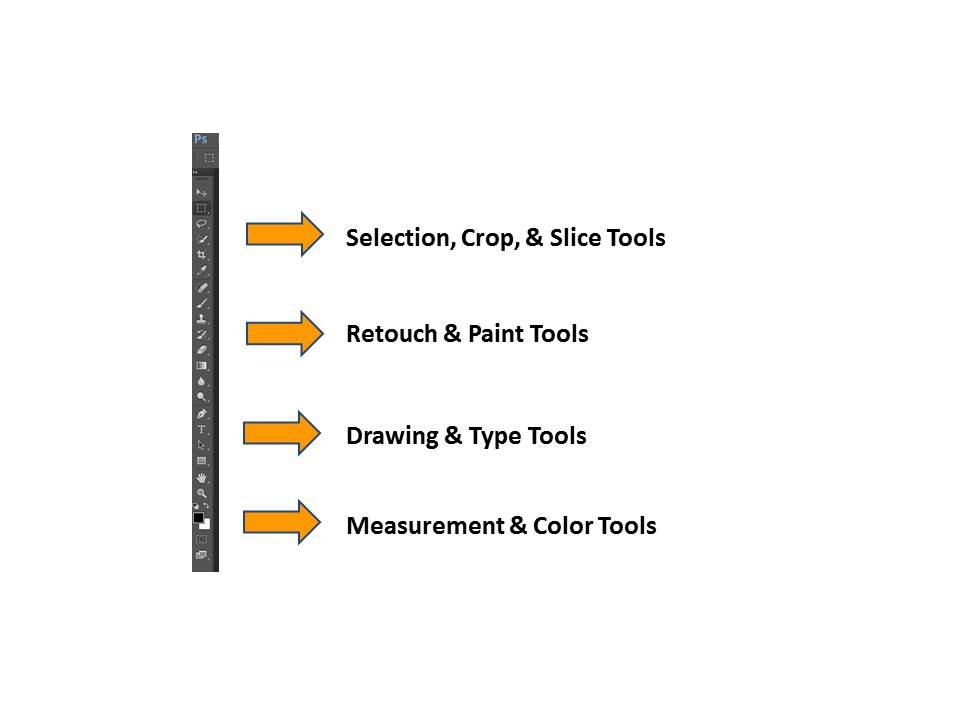
Photoshop’s main toolbar is located on the left-hand side of the program. Every update of Photoshop seems to alter the order of these tools in some way, but the basic organization as of now is as follows….
 Before you delve into the many ways to alter your image, it is important to understand some of the basic features of Photoshop. First off is the “marching ants.” This feature is the dotted lines that seem to “march” clockwise whenever you select something. By selecting something in the document, you have the ability to alter or to move it. To grab and move something, use the hand tool located at the bottom of your toolbar. However, if you did not mean to get the “marching ants” or are done needing them, just click Ctrl+D to deselect the section.
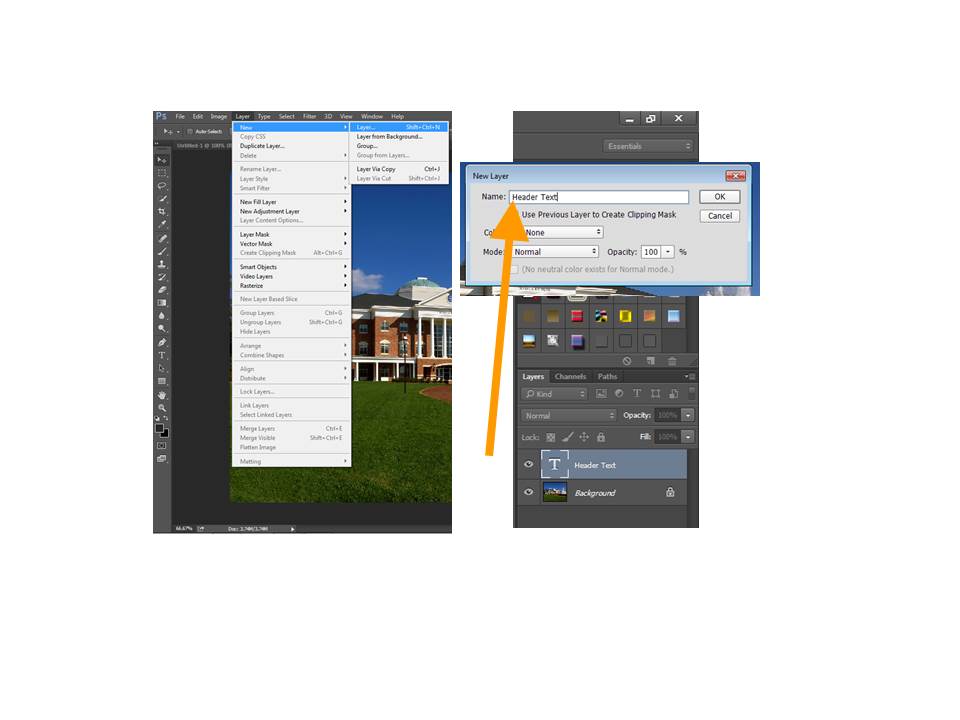
One of the defining features of Photoshop is its layers. By having different layers in a document, it allows the creator to alter certain elements without risking the integrity of the piece as a whole. Layers also provide a way to keep parts of an image organized. For instance, if you are adding trees in to a picture, you don’t want to alter the original image, but rather add trees on a layer on top of the one that already exists. Photoshop also gives you the option to name your layers (shown below), which you should be sure to take advantage of. This allows you to remain a bit more organized. Another feature of layers is that you can “hide” certain layers so as to focus on altering others. Just click the eye next to the appropriate layer, and you will find that it is hidden. If you click on the eye again, it will reappear.
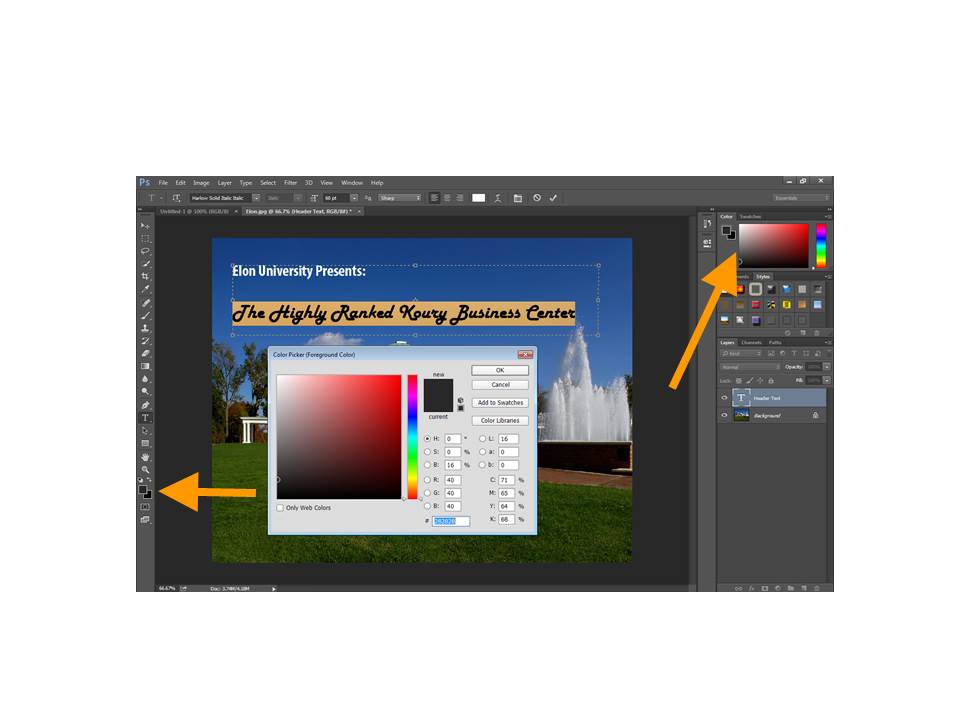
One of the simplest, yet extremely helpful, features is the ability to add and edit text. In order to add text, simply select the text tool towards the bottom of the toolbar. You can then click directly in the document and a text box will be inserted. A toolbar will then appear at the top, giving you the opportunity to change the font type, font style, and size. If you want to change the font color, you must look on the left size toolbar. Towards the very bottom, you will see two overlapping squares. The top square represents the “foreground” color, while the bottom is the “background” color. To change text color, simply double click the top square, and select a color hue from the dialogue box that opens. If you prefer, you can highlight the text, and choose a color from the more permanent color-changing option located on the right hand side (shown in the picture below).
Taking Advantage of the Tools at your Disposal
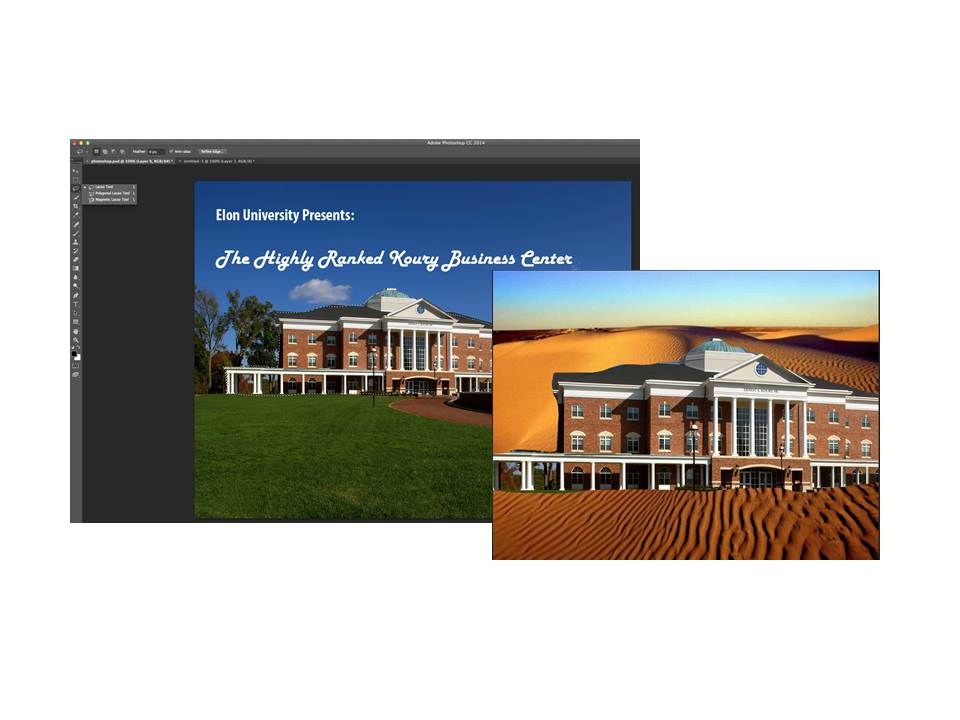
The Lasso Tool can be useful if you want to transpose an image on a different background. With the “Magnetic Lasso Tool” option, Photoshop automatically guesses which parts compose one image by attending to trends in lines and color. This option can be accurate, but that’s not always the case. To manually select an image, you can use the basic Lasso Tool. Select the Lasso Tool option and then drag your mouse along the path that outlines the image you want to be selected. When you have selected the image, you will see marching ants denoting your selection. You can then click Copy to copy the selected image, and then open a new page in Photoshop and Paste the image. As you can see below, I added a new page in Photoshop and inserted an image of a desert. Then, I used the Lasso Tool and copied and pasted the selected image of KOBC in the desert in the new page. Although not the most practical option, it demonstrates the power of the lasso tool.
The Magic Wand Tool automatically selects like colors in an image. This can be helpful if you want to select a larger part of an image, as is shown below with the marching ants when I use it to capture the grass.

The Eyedropper tool lets you capture colors from your image. This is extremely helpful if you want to add in text or other embellishments using the exact colors of the image. To set your foreground color, click on the Eyedropper Tool and then click on the place where you want the color to be captured. To set the background color, press Ctrl + click. These colors will then appear on the left side toolbar in the overlapping squares, and you can use them as you please.
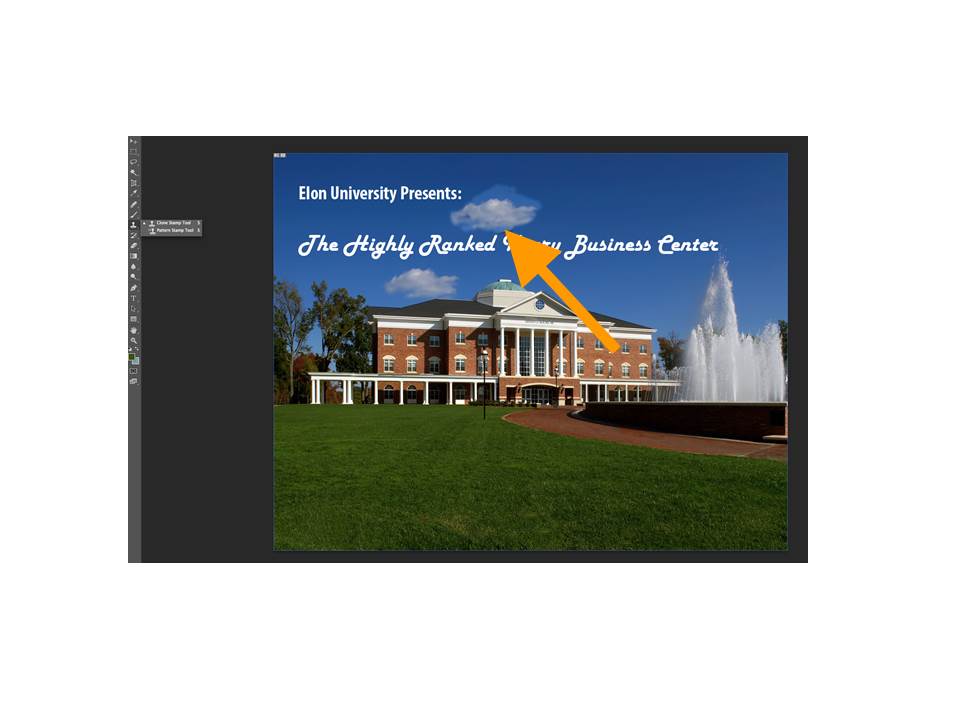
The Clone Stamp tool allows you to completely create new images within your document. If you select this tool and then click on part on an image that you want to clone, you will find that a crosshair appears. That crosshair dictates where the color is being pulled from to create the clone. Wherever you click next is where the cloned image will begin appearing. For example, in the image below, I create a cloud using the Clone Stamp tool.
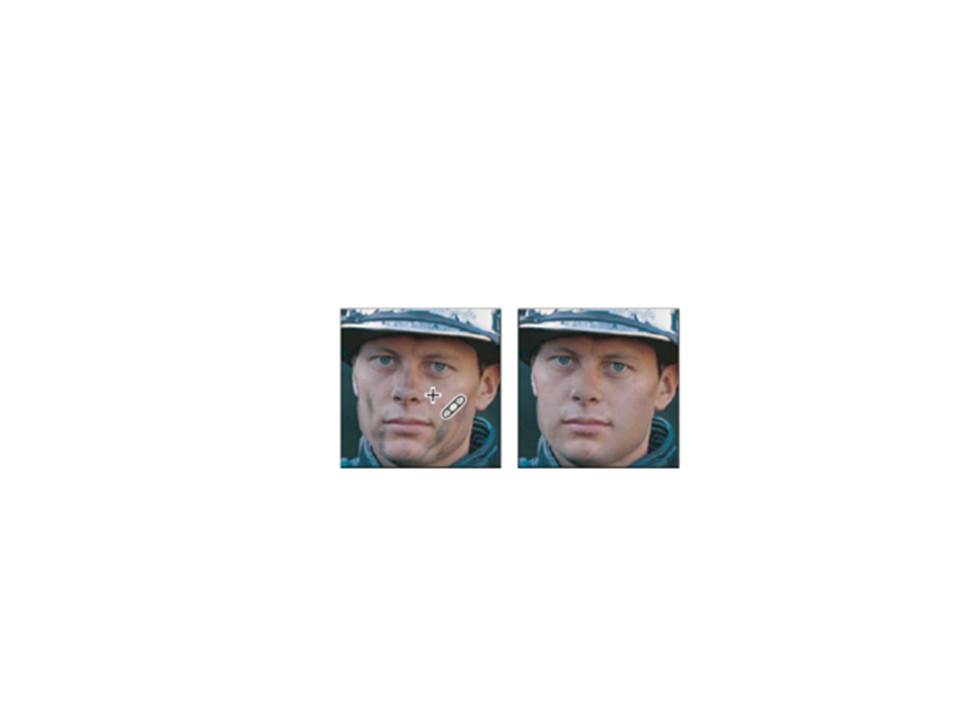
The Spot Healing and Healing Brush tools allow you to get rid of unwanted marks. The difference between the two is that the Spot Healing tool samples from the area around the brush stroke to heal with, while the Healing Brush tool requires you to select an area to use to heal another. In order to use the Healing Brush tool, select that option off of the sidebar and then go to the image where you want it to heal. You’ll select where you want the blemish to be fixed and where the fixing will happen. An example from Photoshop can be seen below, using the Healing Brush Tool to get rid of marks on a soldier’s face.
The Erase & Blur tools let you do those actions with the simple click of a button. Just select either the Eraser Tool or the Blur Tool off of the left toolbar, and then drag your mouse across the part of the image that you want to erase or blur. *Make sure that you are on the correct layer, so that you don’t erase the background or another crucial layer!
Finally, to save your image, select File>Save As, and then you can select from the many options. If you want to save it as a picture, you might want to just use the PNG option, while if you would prefer to keep it a Photoshop document, select that choice from the dropdown.
I hope that this quick look into some of Photoshop’s features has been helpful for you! Consider taking the time to better understand and discover all that Photoshop has to offer.
 Follow
2 Comments
I found this Tech Tip incredibly useful, and I really like how you organized it! I just went on Photoshop and played around with the tips you gave, and it wasn’t as hard as I thought it would be!
Photoshop is one of those tools I fear I will never master. This tech tip was very helpful in explaining the basics of Photoshop!